Here for myself I will save a complete guide on how to start a free (almost) server for meinkraft poorrock and share it with you. I use AWS lightsail test period, they give it for 3 months for free. I'll leave a list of where you can get a test period below:
- Amazon Web Services - They give a year with card linking + can charge some amount from the card, money back. In January 2022 I took it, the money was not charged from my card (Tinkoff).
- Google Cloud Platform - They give a loan of $100 for 3 months. You are required to have a debit card (plastic) and a citizen's passport. Passport is probably required for verification, so that in the future was not taken again. When verifying can hide everything except the name, last name, middle name and photo. Google, too, no money from the card (Tinkoff).
- DigitalOcean - give credit of $ 100 for 2 months (60 days). Can write off the verification payment from the debit card, about the verification with the documents know nothing, the prices are not pleasant against the background of the collapsed ruble.
- Oracle Cloud - They give out weak free VPS/VDS. Suitable for small meinkraft server up to 10 players.
Maybe you know where else give for free or with a test period for a long time? Write in comments, I will add the list.
Creating a server on Amazon Web Services
We take a test period, then go to Amazon lightsail. Click on "Create instance". You set it up like on the picture below.
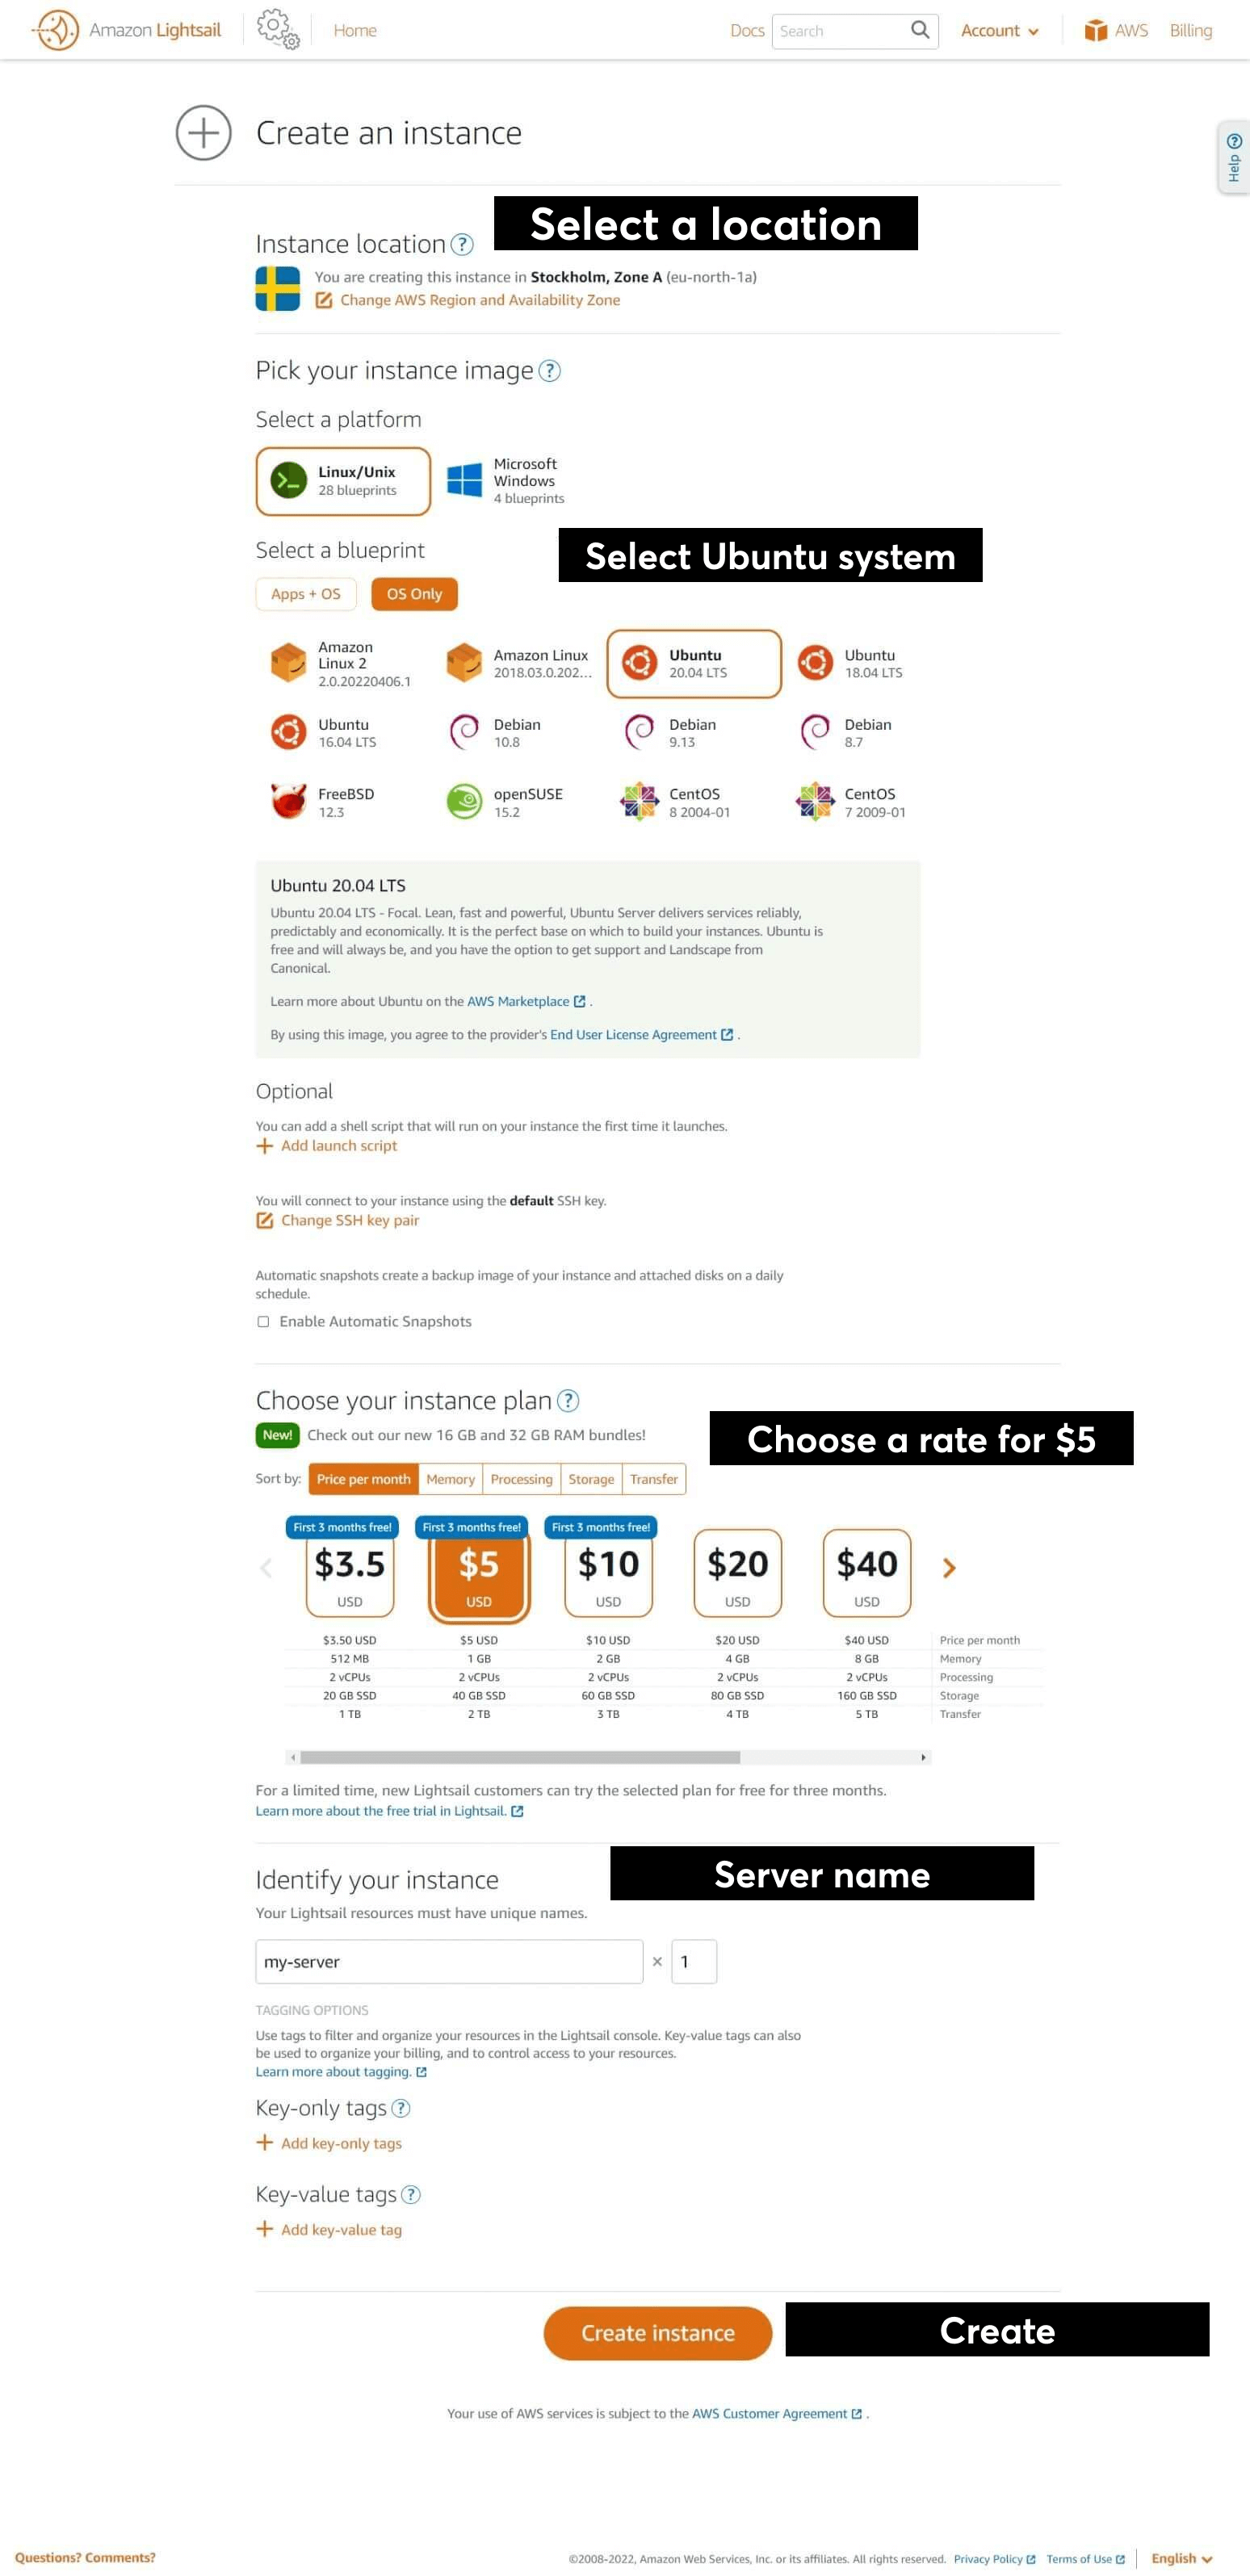
Select a location: Choose one that is close to you. The closer the server, the less chance of high pings.
Choose Ubuntu system: System version 20.04 LTS.
Write name: Any.
Create.
Server Installation
Now starting from login to the console, the instruction is the same for all VDS/VPS servers.
How to enter SSH? Download the program putty.
How to know data to login? Some hosting providers send it to e-mail. You can get it from their support.
Before we start, we have to update all packages and repositories on the system with the command:
sudo apt-get -y update && sudo apt-get -y dist-upgradeCreate a folder with the command mkdir:
mkdir server-bedrock
server-bedrock - directory name
After creating it, navigate to this directory with the command cd:
cd server-bedrockNow let's use wget to download the server files:
wget https://minecraft.azureedge.net/bin-linux/bedrock-server-1.18.30.04.zip
Now we need to unzip the folder downloaded to the server. Let's install the zip utility with the command:
sudo apt install unzipAfter installation, enter the command:
unzip bedrock-server-1.18.30.04.zipWhere 1.18.30.04, enter the version of the game.
Starting the server
For constant server operation, we will use the screen command:
screen -S server-bedrockGive permissions to the file bedrock_server to read and execute the file:
chmod 777 bedrock_serverEnter a command:
./bedrock_server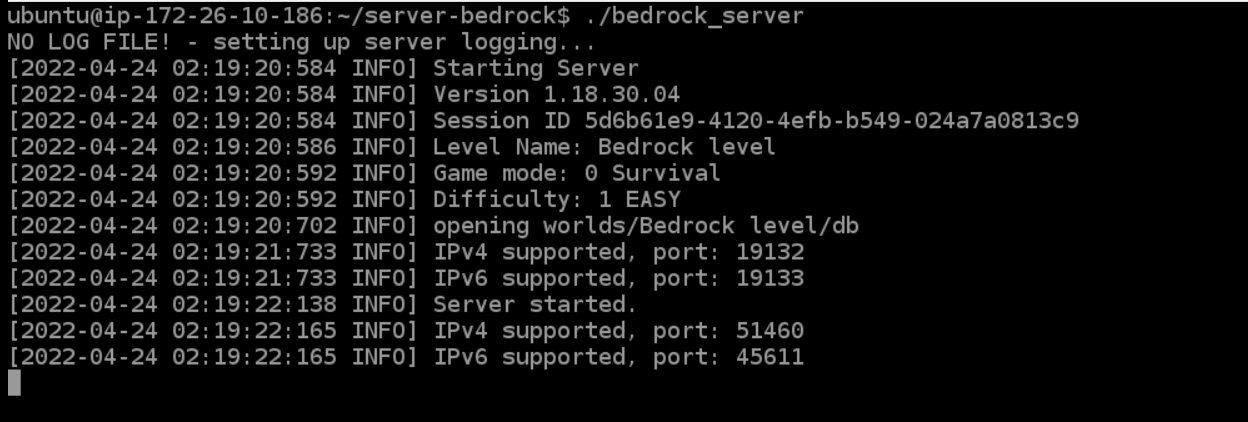
The server is running. Go into the game, enter ip and port, make sure the server is working.